Your Home Pain Relief Workflow: A Step-by-Step Guide
Your Home Pain Relief Workflow: A Step-by-Step Guide
TL;DR:
- A structured home pain relief workflow involves pain tracking, multimodal therapies, and regular reassessment to effectively manage pain and improve function. Consistent implementation over four to eight weeks with specific goals enhances outcomes more than reactive or unorganized approaches. Sharing data with professionals and maintaining patience are crucial for lasting pain reduction and improved quality of life.
A home pain relief workflow is a structured, repeatable process that combines pain tracking, targeted therapies, and scheduled reassessment to reduce pain and improve daily function without relying solely on medication. Unlike grabbing a heating pad or taking an over-the-counter pill when pain spikes, a true home pain management process treats relief as a system. That system includes pain diaries, temperature therapies, low-impact exercise, and mind-body techniques like cognitive behavioral therapy (CBT) and mindfulness. When built correctly, this kind of structured approach gives you real control over your pain rather than just reacting to it.
What is a home pain relief workflow and why does it matter?
A home pain relief workflow is defined as a systematic pain management process that moves through four phases: baseline assessment, goal setting, multimodal therapy, and reassessment. Most people skip straight to treatment and wonder why their pain keeps returning. The reason is simple: without a baseline, you cannot measure progress, and without scheduled reassessment, you cannot tell whether your plan is working or failing.
The Six Essentials framework for home pain management covers education, non-drug therapies, medication safety, tracking, communication, and virtual support. This matters because knowledge gaps cause patients to focus only on symptoms rather than root causes, which leads to overreliance on medications and short-term fixes. A structured workflow closes that gap by giving you a repeatable playbook instead of a guessing game.
The payoff is measurable. Digital tracking tools can improve treatment adherence by 64% and reduce emergency visits by 12%. That is not a marginal improvement. It represents a fundamental shift from passive suffering to active management.
How to track and assess your pain effectively at home
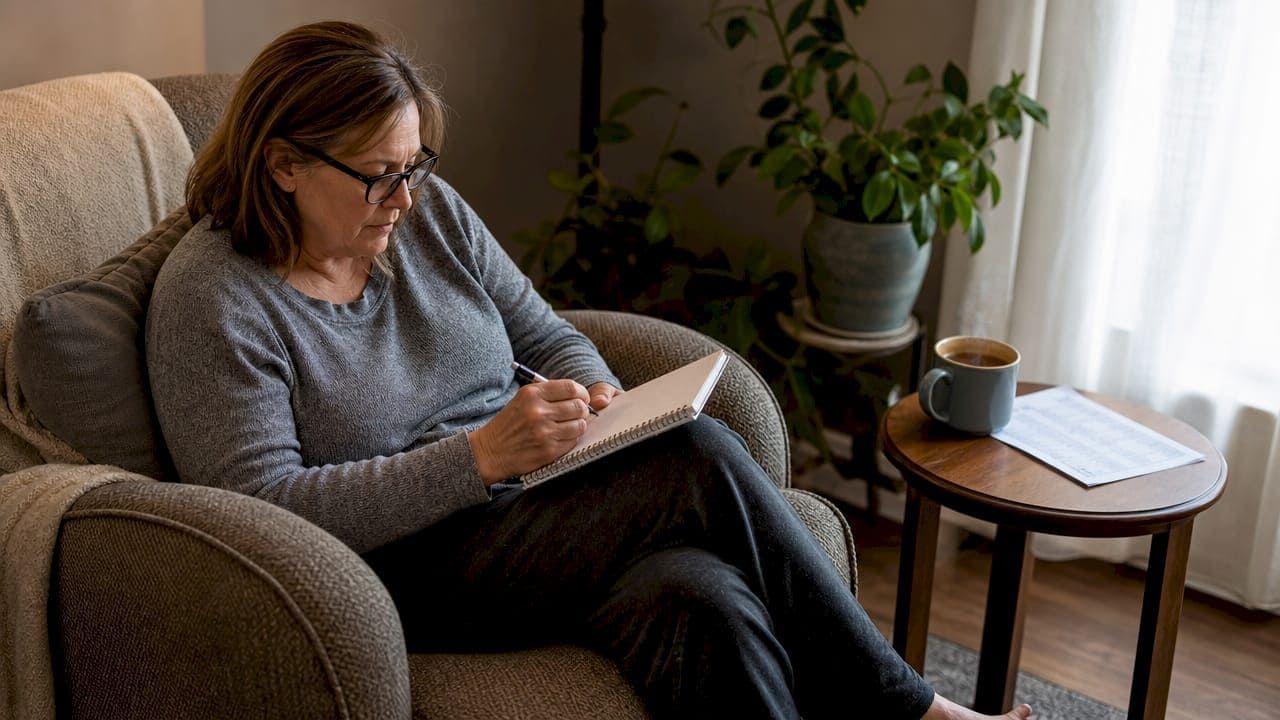
Accurate pain tracking is the foundation of any effective home pain management process. Without it, you are adjusting therapies based on memory and mood rather than data. The goal of tracking is to identify patterns: what triggers your pain, when it peaks, how long it lasts, and which interventions actually help.
A pain diary is the most reliable low-tech tool available. Log pain intensity on a 0-to-10 scale, note the time of day, physical activity beforehand, sleep quality, and any medications taken. Run this log for at least two weeks before drawing conclusions. Two weeks gives you enough data to spot recurring triggers rather than one-off events.
Pro Tip: Use exception-based tracking rather than logging every hour. Clinicians recommend monitoring meaningful symptom changes rather than constant logging. Set a threshold, such as any pain above 6/10 or any sudden spike, and only record those events. This approach is more sustainable and surfaces the data that actually drives treatment decisions.
Digital tools add another layer of value. Apps like Manage My Pain or simple spreadsheets allow you to share data directly with your chiropractor or physical therapist, which improves communication and reduces the friction of recalling symptoms from memory during appointments. For caregivers managing pain on behalf of a family member, shared telehealth dashboards with symptom reporting and coordination checklists reduce emotional burden and keep the workflow consistent across multiple people.
Key elements to track in your pain diary:
- Pain intensity (0-10 scale) at consistent times each day
- Specific location and type of pain (sharp, dull, burning, aching)
- Activity or posture immediately before pain onset
- Sleep quality the previous night
- Medications or therapies used and their effect within two hours
What are the most effective multimodal home pain relief techniques?
The most durable pain relief comes from combining multiple therapies that target function and quality of life rather than chasing total pain elimination. No single technique works for every type of pain, which is why a multimodal approach consistently outperforms single-method strategies.
Temperature therapy: ice vs. heat
Ice therapy is the correct choice for acute pain in the first 24 to 48 hours after injury. Apply for 10 to 15 minutes with a cloth barrier between the ice pack and your skin, then remove for at least 45 minutes before reapplying. Applying ice directly on skin for longer than 15 to 20 minutes causes tissue damage. Heat therapy works better for chronic muscle or joint stiffness. Apply at 40°C to 45°C for 15 to 20 minutes, using a folded towel to regulate temperature and protect the skin surface.
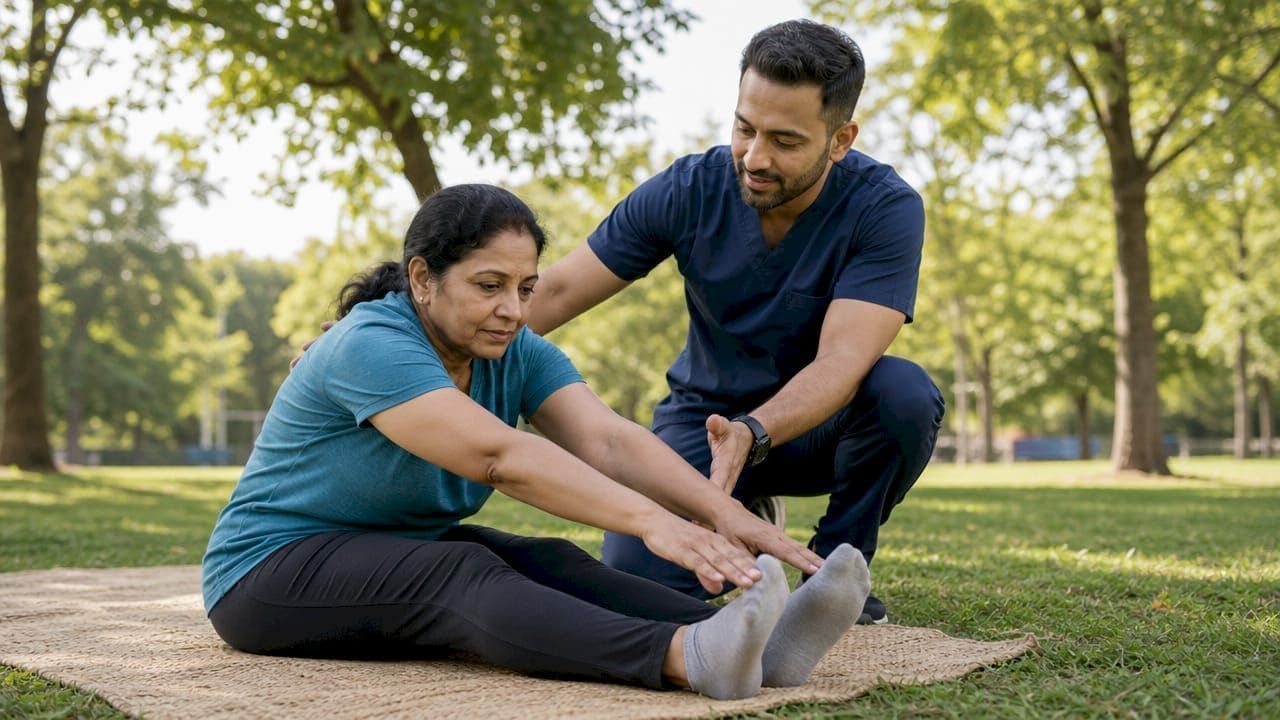
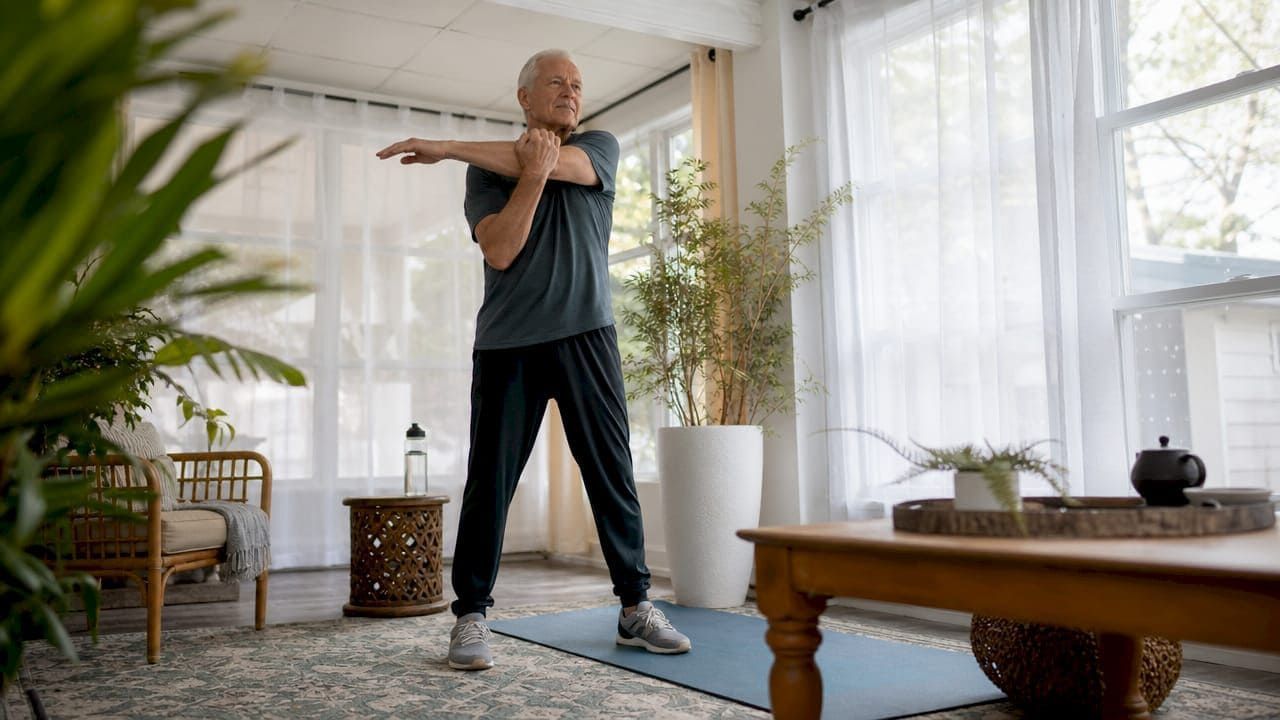
Exercise as medicine
Experts recommend 150 minutes of low-impact aerobic activity per week as part of a home pain management plan. Walking, swimming, and cycling all qualify. Aerobic exercise triggers endorphin release and can improve sleep quality by approximately 25%, which itself reduces pain sensitivity. Add strength and mobility work two to three times per week to support joint health. Explore therapeutic exercise programs designed specifically for home-based pain recovery to build a safe progression plan.
Mind-body techniques
CBT and mindfulness meditation change how the brain processes pain signals, reducing the emotional amplification that makes chronic pain worse. Even 10 minutes of guided mindfulness daily, using apps like Calm or Insight Timer, produces measurable reductions in pain catastrophizing over four to eight weeks.
| Technique | Best for | Application | Key benefit |
|---|---|---|---|
| Ice therapy | Acute injury (0-48 hrs) | 10-15 min, cloth barrier, 45-min rest | Reduces inflammation and swelling |
| Heat therapy | Chronic stiffness | 15-20 min at 40°C-45°C, towel layer | Relaxes muscle tension, improves circulation |
| Low-impact aerobics | Chronic pain maintenance | 150 min/week, moderate intensity | Endorphin release, better sleep |
| Strength training | Joint support | 2-3x/week, progressive load | Reduces joint stress over time |
| Mindfulness/CBT | Chronic pain amplification | 10 min daily, consistent practice | Lowers pain catastrophizing |
Pro Tip: Never switch from ice to heat within the same 24-hour window for a new injury. The transition from cold to heat too early increases blood flow to an already inflamed area, which worsens swelling rather than reducing it.
How to set goals and schedule reassessment checkpoints
Goal setting transforms your home pain relief techniques from a loose collection of habits into a measurable plan. Vague goals like "feel better" produce vague results. Specific goals like "reduce resting pain from 7/10 to 4/10 within six weeks" give you a clear target and a timeline to evaluate whether your current approach is working.
Reassessment every four to eight weeks prevents two common mistakes: abandoning a plan too early because results feel slow, and continuing a plan that stopped working weeks ago. Four weeks is the minimum time most therapies need to produce detectable changes. Eight weeks is the outer limit before a plan needs formal review.
Follow this numbered process to build and maintain your goal structure:
- Define your baseline. Use your first two weeks of pain diary data to establish your average pain score, worst pain score, and the activities most affected.
- Set one primary goal. Choose a single measurable outcome: a pain score target, a mobility milestone (walking 20 minutes without stopping), or a sleep improvement (fewer than two nighttime wake-ups).
- Set two supporting goals. These are behavioral: completing 150 minutes of exercise per week, practicing mindfulness five days per week, or applying heat therapy before morning activity.
- Schedule your first reassessment. Mark a date four weeks out. Do not evaluate progress before this date. Premature evaluation leads to premature changes.
- Celebrate small wins. Recognizing incremental progress boosts motivation and adherence. A pain reduction from 7/10 to 5.5/10 at week four is meaningful progress, not failure.
- Adjust and repeat. After each reassessment, modify one variable at a time. Changing multiple therapies simultaneously makes it impossible to identify what is actually working.
Sharing these goals with your chiropractor or physical therapist at Essentialchirocare creates accountability and allows your provider to catch problems you might miss from inside the experience.
Common challenges in home pain management and how to fix them
The most frequent failure point in any home pain relief process is inconsistency during the first two weeks. Pain fluctuates, motivation drops, and the temptation to abandon the plan or escalate to stronger interventions arrives before the workflow has had time to work.
"Active care workflows with pre-defined playbooks for symptom spikes facilitate timely responses and improve outcomes." This means having a written plan for what you will do when pain spikes to 8/10 is more effective than deciding in the moment.
Environmental factors also undermine adherence. Cluttered spaces increase fear-avoidance behaviors, where you stop moving because you fear making pain worse. Decluttering your exercise area and creating a dedicated space for therapy removes a subtle but real barrier to consistency.
Dos and don'ts for sustainable home pain management:
- Do treat the first one to two weeks of any new exercise as a calibration phase focused on form and adherence, not intensity
- Do use shared digital portals or apps when a caregiver is involved to reduce communication gaps
- Do adjust your environment to support calm nervous system function (lighting, temperature, clutter)
- Don't apply ice or heat without a protective barrier, regardless of how mild the temperature feels
- Don't change multiple therapies at once when progress stalls
- Don't skip reassessment checkpoints because you feel better. Feeling better is the result of the plan working, not a reason to stop following it
Review common pain relief misconceptions before finalizing your plan to avoid the most costly errors patients make when managing pain independently.
Key takeaways
A structured home pain relief workflow built on tracking, multimodal therapy, and scheduled reassessment produces better outcomes than reactive, symptom-only management.
| Point | Details |
|---|---|
| Track before you treat | Log pain for at least two weeks to establish a reliable baseline before changing therapies. |
| Use temperature therapy correctly | Ice for acute injury (first 48 hours), heat for chronic stiffness, always with a protective barrier. |
| Combine therapies for best results | Aerobic exercise, mindfulness, and temperature therapy together outperform any single approach. |
| Set specific, measurable goals | Replace vague intentions with scored targets and reassess every four to eight weeks. |
| Protect the calibration phase | Treat the first two weeks of any new exercise as form-building, not performance. |
Why patience is the most underrated pain management tool
I have worked with enough people managing chronic pain to say this plainly: the biggest obstacle is not finding the right therapy. It is staying with a plan long enough for it to work. Most people abandon a structured approach at week two or three, right before the compounding effects of consistent exercise and mindfulness start to show up in their pain scores.
The workflows that actually produce lasting relief share one characteristic: they treat pain management as a functional prescription, not a crisis response. That means decluttering your space to reduce nervous system stress, scheduling exercise the way you schedule a meeting, and treating a spike in pain as data rather than a sign that everything has failed. The self-care strategies that hold up over months are almost always the boring, consistent ones, not the dramatic interventions.
Technology helps more than most people expect. Sharing your pain diary data with your provider through a digital portal changes the quality of every appointment. Instead of describing how you felt last Tuesday from memory, you hand over three weeks of logged data and walk out with a plan that actually reflects your pattern. That shift from subjective recall to objective data is where home pain management stops being guesswork.
The other thing I would tell anyone starting this process: celebrate the 5.5/10. A reduction from 7 to 5.5 in four weeks is not a disappointment. It is proof the system is working, and proof is what keeps you going when motivation fades.
How Essentialchirocare supports your home pain relief plan
Your home workflow is most effective when it connects to professional guidance that can identify what you cannot see on your own.
Essentialchirocare offers personalized pain assessments, chiropractic adjustments, therapeutic exercise programming, and physical rehabilitation services across Tampa, Brandon, Sarasota, Lakeland, and Pinellas Park. Whether you are managing chronic joint pain, recovering from an acute injury, or looking to reduce your reliance on medication, the clinical team at Essentialchirocare builds plans that integrate directly with what you are already doing at home. Schedule a consultation to get a professional baseline assessment and a structured plan that complements your home pain management process.
FAQ
What is a home pain relief workflow?
A home pain relief workflow is a structured process combining pain tracking, multimodal therapies (heat, ice, exercise, mindfulness), and scheduled reassessment checkpoints every four to eight weeks to manage pain systematically at home.
How long does it take to see results from a home pain management process?
Most therapies require at least four weeks of consistent application before producing detectable changes in pain scores. Reassess at four weeks and again at eight weeks before concluding a plan is not working.
Is ice or heat better for pain relief at home?
Ice is better for acute injuries in the first 24 to 48 hours, applied for 10 to 15 minutes with a cloth barrier. Heat works better for chronic muscle or joint stiffness, applied at 40°C to 45°C for 15 to 20 minutes.
How much exercise should I do for chronic pain management?
Experts recommend 150 minutes of low-impact aerobic activity per week, such as walking, swimming, or cycling, combined with strength and mobility exercises two to three times per week to support joint health and improve sleep quality.
When should I see a professional instead of managing pain at home?
Seek professional evaluation when pain scores remain above 6/10 after four to six weeks of consistent home management, when pain follows an injury, or when new symptoms like numbness or weakness appear alongside existing pain.
Recommended