Ergonomic Setup Checklist: Fix Pain at Your Desk
Ergonomic Setup Checklist: Fix Pain at Your Desk
Use this 10-minute ergonomic setup checklist to fix the top causes of neck, back, and wrist strain right now. Run through these checks before buying a single piece of new equipment — most problems are solved by repositioning what you already have.
Quick 10-minute checklist:
- Chair height: Feet flat on the floor, knees at roughly 90°, thighs parallel to the ground
- Monitor height: Top of screen at or just below eye level, 20–26 inches from your face
- Keyboard and mouse: Elbows at 90–100°, wrists straight, mouse immediately beside the keyboard
- Lumbar support: Chair back pressing gently at belt-line level (lower back, not mid-back)
- Foot support: Feet fully supported — floor or footrest, never dangling
- Lighting: No glare on screen, monitor perpendicular to windows
- Movement timer: Set a reminder to change position or stand every 20–30 minutes
If you answered "no" to three or more of these, start with repositioning. If repositioning doesn't help after a week, add a low-cost accessory (footrest, monitor riser). If pain or numbness persists beyond two weeks, see a clinician. The printable yes/no self-assessment checklist is in Section 9 below.
Key Takeaways
A correct ergonomic setup requires starting with the chair, setting the monitor next, then positioning the keyboard and mouse — in that order — and pairing the setup with regular movement breaks to prevent musculoskeletal fatigue.
| Point | Details |
|---|---|
| Chair first, always | Set seat height so feet are flat and knees at ~90° before adjusting anything else. |
| Monitor at arm's length | Top of screen at or just below eye level, 20–26 inches away, tilted 10–20° back. |
| Keyboard and mouse neutral | Elbows at 90–100°, wrists straight, mouse immediately beside the keyboard. |
| Move every 20–30 minutes | Use the 20-8-2 cycle or a timer app; static posture in any position increases spinal load. |
| Reposition before you buy | Free adjustments resolve most ergonomic problems; spend only when repositioning fails. |
| Essentialchirocare for persistent pain | If symptoms persist after two weeks of corrected setup, book a clinical evaluation at one of the West Central Florida locations. |
Table of Contents
- What does a good ergonomic setup checklist cover for your desk?
- How should you set your chair for proper ergonomic support?
- How do you position your keyboard and mouse to avoid wrist strain?
- How do you use a sit-stand desk safely without overdoing it?
- What are the best quick fixes for laptop ergonomics?
- Which accessories actually improve ergonomics and which ones don't?
- What movement habits actually prevent fatigue and injury?
- Printable self-assessment checklist: yes or no for every item
- What setup mistakes cause the most pain, and when should you see a clinician?
- How should you prioritize ergonomic purchases?
- What small workstation changes actually move the needle for patients?
- Pain persisting after checklist fixes? Essentialchirocare can help
- Sources
What does a good ergonomic setup checklist cover for your desk?
Monitor placement is the single highest-impact fix for neck strain, and it takes about 90 seconds to get right. According to ergonomic desk setup guidance, the top of your screen should sit at or slightly below eye level, 20–26 inches from your face, tilted back 10–20°. If you have to look down sharply or crane your neck up, your monitor is in the wrong position.
The arm's-length test: Sit back in your chair and extend one arm forward. Your fingertips should nearly touch the screen. Too close and you'll strain your eyes; too far and you'll lean forward, loading your neck.
The eye-line test: Sit naturally, close your eyes, then open them. Where your gaze lands naturally is where the top third of your screen should be. If you're staring at the bottom bezel, raise the monitor with a riser, a stack of books, or an adjustable arm.
For dual monitors, place the primary screen directly in front of you and the secondary at a slight angle. If you use both equally, center them so the gap sits at your midline. Laptop screens are a special case — covered in Section 6.
Lighting matters more than most people realize. Aim for 300–500 lux at desk level, which is roughly the brightness of a well-lit office. Position your monitor perpendicular to windows, not facing them or with your back to them, to avoid glare washing out the screen. Bias lighting — a low-wattage LED strip behind the monitor — reduces the contrast between a bright screen and a dark wall, which cuts eye fatigue during long sessions. For color temperature, 4,000–5,000K (neutral white) works well during the day; drop to 3,000K or warmer in the evening to reduce blue-light exposure.
| Parameter | Target | Quick test |
|---|---|---|
| Monitor distance | 20–26 inches | Arm's-length reach |
| Top of screen | At or just below eye level | Close eyes, open, note gaze |
| Screen tilt | 10–20° back | Visual check from the side |
| Ambient light | 300–500 lux | Lux meter app on phone |
| Monitor angle to window | Perpendicular | Check for screen glare |
Pro Tip: Sit at your desk for five minutes doing a normal task, then notice where your eyes are landing on the screen. If you're consistently reading text in the bottom half of the display, your monitor is too high — not too low. Most people raise it too far.
How should you set your chair for proper ergonomic support?
Start with the chair. Every other measurement — desk height, monitor position, keyboard tray — depends on getting the chair right first. Mayo Clinic's office ergonomics guide recommends starting with seat height and foot support before touching anything else, because misordering the adjustments makes every later setting wrong.
Follow this sequence:
- Seat height: Adjust until feet rest flat on the floor and knees are at approximately 90°. Ankles, knees, and hips should each form roughly 90° angles — the 90/90/90 baseline. If the chair goes high enough to achieve this but your feet lift off the floor, add a footrest.
- Seat depth: Slide forward or back until there's a 2–3 finger gap between the front edge of the seat and the back of your knees. Too much seat depth cuts off circulation; too little gives you no thigh support.
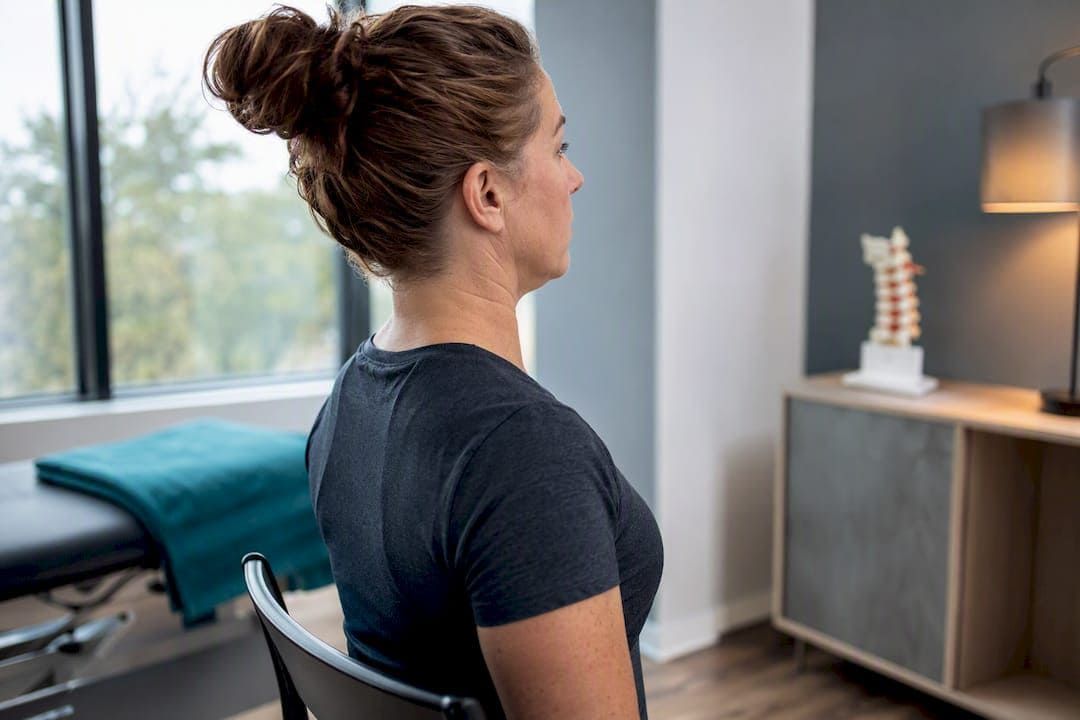
- Lumbar support: The lumbar pad or curve should press against your lower back at belt-line level, roughly L3–L4. If it's hitting your mid-back, you're sitting too low or the support is set too high.
- Backrest angle: Recline slightly to 100–110°. A strict 90° upright posture actually increases disc pressure compared to a slight recline.
- Armrest height: Raise armrests until your shoulders drop and elbows rest at roughly 90°. If armrests force your shoulders up, lower them or remove them entirely.
- Foot support: Confirm feet are fully supported. A footrest is not optional if your feet dangle even slightly.
Pro Tip: If your chair lacks lumbar support, roll a bath towel to roughly 4 inches in diameter and place it horizontally at belt level between your lower back and the chair back. Press your back against it — if it falls out immediately, it's too thick. The goal is gentle, continuous contact, not a hard push.
How do you position your keyboard and mouse to avoid wrist strain?
Keep the keyboard and mouse at elbow height, with wrists straight and the mouse immediately adjacent to the keyboard — no reaching. That's the whole rule. Everything else is refinement.
Elbow angle should be 90–100°, with upper arms hanging naturally at your sides. If your elbows are flaring out to reach the mouse, the mouse is too far away. A compact or tenkeyless (TKL) keyboard eliminates the numpad and closes that gap significantly, which is one of the most underrated fixes for shoulder strain.
Wrist rests are for pauses between typing, not for active typing. Resting your wrists on a hard surface while your fingers move compresses the carpal tunnel and is a documented cause of repetitive strain injury. Mayo Clinic notes that contact stress from hard desk edges is a common, overlooked pain source — pad sharp edges or use a keyboard tray that lets your arms float.
For mouse alternatives, a vertical mouse keeps the forearm in a handshake position rather than fully pronated, which reduces forearm rotation strain. A trackball mouse eliminates wrist movement entirely, which helps when wrist tendons are already irritated. Neither is universally better — pick based on your specific symptoms.
Pro Tip: If your wrists ache after a full workday despite correct positioning, check your keyboard tilt. Most keyboards ship with the rear legs flipped up, which tilts the keys away from you and forces wrist extension. Fold those legs down so the keyboard is flat or slightly negative-tilted (front edge higher than rear).
If wrist or hand symptoms — tingling, numbness, weakness — persist for more than two weeks after correcting your setup, consult a clinician or occupational therapist. These symptoms can indicate nerve involvement that positioning alone won't resolve.
How do you use a sit-stand desk safely without overdoing it?
Alternating positions frequently beats marathon standing. Cornell ergonomics research supports frequent position changes and micro-movements over extended static postures in either direction — standing for hours straight creates its own fatigue and circulatory problems.
The 20-8-2 movement cycle is a practical starting point: 20 minutes sitting, 8 minutes standing, 2 minutes walking or moving. A 30-minute sit/stand rotation works equally well for most people. The exact ratio matters less than the habit of transitioning regularly.
Dos and don'ts for standing:
- Do: keep the same keyboard and monitor ergonomics when standing as when sitting
- Do: wear supportive, cushioned footwear — flat, hard-soled shoes defeat the purpose of an anti-fatigue mat
- Do: use an anti-fatigue mat (3/4 inch thick minimum) to reduce leg and lower-back fatigue
- Don't: lock your knees while standing — shift weight, use a footrest rail, or place one foot on a low step
- Don't: stand so long that you start leaning on the desk, which loads the wrists and rounds the shoulders
Pro Tip: When you transition to standing, re-check your monitor height. Most sit-stand desks move the whole surface, so the monitor rises with it — but if you've been using a monitor riser, the combined height may push the screen too high. Aim for the same eye-line target: top of screen at or just below eye level.
Free timer apps like Time Out (macOS) or Workrave (Windows) enforce break and position-change reminders without requiring you to watch a clock.
What are the best quick fixes for laptop ergonomics?
The laptop's built-in screen and keyboard can't both be in the right position at the same time. Raise the screen to eye level and the keyboard goes too high; keep the keyboard at elbow height and the screen drops to neck-strain territory. The fix is to separate them.
Use a laptop stand or riser to lift the screen to eye level, then connect an external keyboard and mouse at elbow height. This setup costs under $50 for basic peripherals and resolves the core conflict immediately. PennEHRS home-office guidance specifically recommends this approach for anyone using a laptop as their primary work device.
Short-term fixes when you can't get peripherals:
- Stack books or a sturdy box under the laptop to raise the screen
- Reduce font size slightly so you can sit farther back without squinting
- Take a break every 20 minutes — laptop posture degrades faster than desktop posture
Avoid long sessions on couches or beds. The soft surface tilts your pelvis, rounds your lower back, and forces your neck forward. A firm cushion or a lap desk helps for short sessions, but it's not a substitute for a proper surface.
A docking station is worth the investment when the laptop is your daily primary device. It lets you connect a full-size external monitor, keyboard, and mouse in one connection, and most modern docks add USB-A ports and ethernet that laptops have dropped.

Which accessories actually improve ergonomics and which ones don't?
Prioritize by complaint, not by what looks most "ergonomic" on a product page. Here's a ranked order based on impact:
- External keyboard and mouse (if using a laptop): highest impact, lowest cost. Separates input from screen and immediately corrects the laptop posture trap.
- Monitor riser or adjustable arm: fixes monitor height without buying a new desk. A $15 riser does the same job as a $200 arm for most setups.
- Footrest: non-negotiable if your feet don't reach the floor when the chair is at the correct height. A firm, angled footrest works better than a flat one.
- Anti-fatigue mat: meaningful for standing desk users; negligible for those who sit all day.
- Document holder: positions reference materials at monitor height, eliminating repeated neck flexion when switching between paper and screen.
- Headset or speakerphone: eliminates phone-cradling, which is one of the fastest ways to develop neck and shoulder pain.
- Lumbar cushion: useful when a chair's built-in support is absent or poorly shaped, but a rolled towel works just as well.
What to avoid: Wrist rests used during active typing (see Section 4). Chairs marketed as "ergonomic" that lack seat-height adjustment and lumbar adjustment — the label means nothing without those two features at minimum.
Cable management has a real ergonomic benefit beyond aesthetics. Cables running across the desk create obstacles that force awkward reaching, and loose cables on the floor create trip hazards for standing desk users. A cable tray under the desk, adhesive cable clips along the back edge, and a cable sleeve for monitor/power bundles take about 20 minutes to install and eliminate most of the clutter. Velcro ties beat zip ties because you can adjust them when your setup changes.
What movement habits actually prevent fatigue and injury?
Static posture is the enemy, regardless of how perfect your chair position is. Cornell ergonomics research shows that sustained posture increases musculoskeletal fatigue and spinal compression, and that frequent micro-movements and position changes reduce that load meaningfully.
The 20-20-20 rule targets eye strain: every 20 minutes, look at something 20 feet away for 20 seconds. This relaxes the ciliary muscles in the eye that stay contracted during close screen work. Mayo Clinic supports this rule alongside the monitor distance recommendation of 20–26 inches.
The 20-8-2 cycle targets the rest of the body: 20 minutes sitting, 8 standing, 2 walking. Pair it with the 20-20-20 rule and you get eye and body relief on the same timer.
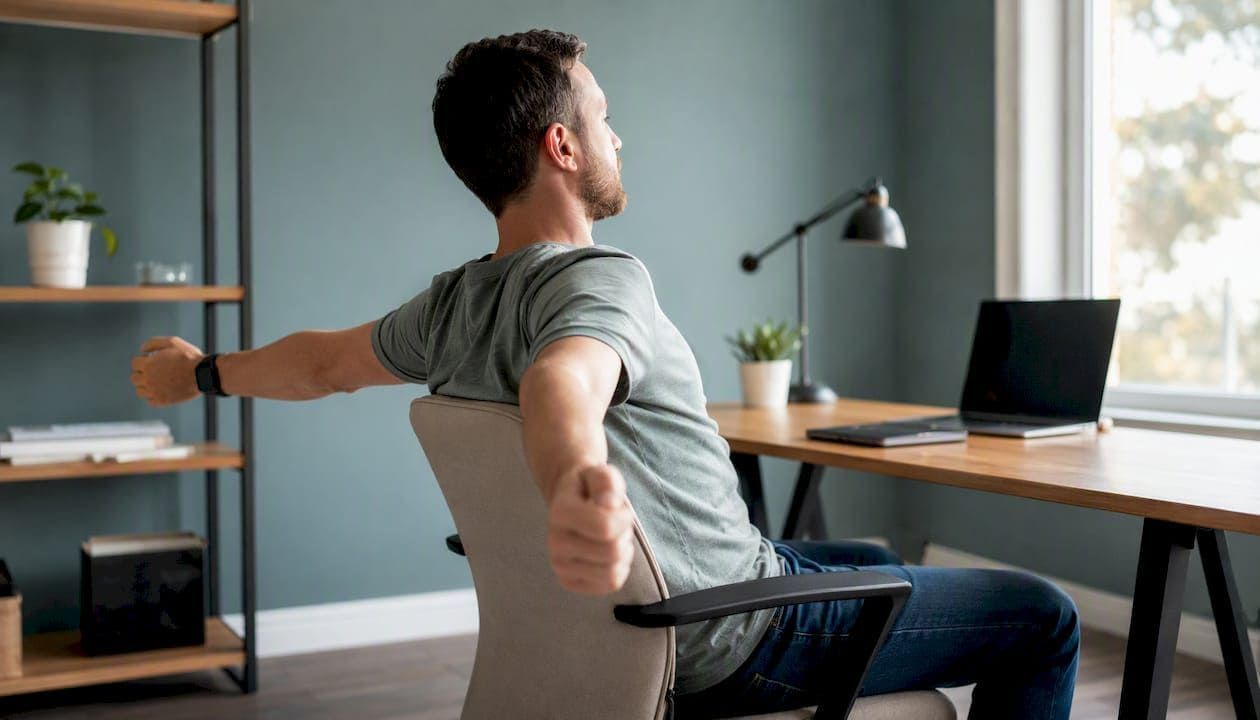
Four exercises you can do at your desk without leaving your chair:
- Neck rotation: Slowly turn your head left until you feel a gentle stretch, hold 5 seconds, repeat right. Three reps per side.
- Shoulder rolls: Roll both shoulders backward in a full circle, 10 repetitions. This counters the forward-rounding that builds up during typing.
- Seated hamstring stretch: Extend one leg straight, flex the foot, and hold 15 seconds. Alternating legs improves circulation in the lower body.
- Wrist stretches: Extend one arm, palm up, and gently pull the fingers back with the other hand. Hold 10 seconds, switch. Do this every hour if you type heavily.
For standing desk users, standing calf raises (10–15 reps) during a standing interval keep blood moving in the lower legs and reduce the ankle swelling that comes with prolonged standing.
Sustained static posture, whether sitting or standing, increases spinal load and musculoskeletal fatigue. Frequent micro-movements and position changes are the most evidence-backed strategy for reducing that load throughout the workday. — Cornell ergonomics research
Pair these habits with the home exercises recommended for spinal health to reinforce what your workstation setup starts.
Printable self-assessment checklist: yes or no for every item
Run through this table once. For every "No," the action column tells you what to do next. No equipment purchase is required for most fixes.
Escalation rules:
- Reposition first (free): covers most "No" answers above
- Low-cost fix (<$50): footrest, monitor riser, external keyboard/mouse, cable clips
- Equipment upgrade ($50–$300): adjustable chair, monitor arm, anti-fatigue mat, docking station
- See a clinician: persistent pain, numbness, tingling, or weakness after two weeks of corrected setup
OSHA's computer workstation evaluation checklist covers additional workplace-specific items for office environments beyond home setups.
What setup mistakes cause the most pain, and when should you see a clinician?
The most common mistakes are predictable, and most are free to fix.
Monitor too low is the single most frequent error. When the screen sits at keyboard level or below, you flex your neck forward for hours. The cumulative load on cervical discs is significant. Raise the monitor — even a ream of printer paper works as a temporary riser.
Keyboard too high forces the shoulders to shrug and the wrists to extend. This usually happens when someone sets the desk height first and then sits down, rather than setting the chair first. Lower the desk surface or use a keyboard tray that drops below desk level.
Feet unsupported tilts the pelvis backward and flattens the lumbar curve, which loads the lower back. If your chair is at the right height for your elbows but your feet don't reach the floor, a footrest is not optional.
Resting wrists on the desk edge during typing compresses the carpal tunnel. The fix is a padded edge cover or a keyboard tray that lets the arms float. Wrist rests are for resting between tasks, not for use while typing.
Red-flag symptoms that need clinical evaluation:
- Numbness or tingling in the hands, fingers, or arms that doesn't resolve after a few minutes of repositioning
- Progressive weakness in grip or fine motor tasks
- Pain that worsens despite a week or more of corrected setup
- Radiating pain from the neck into the arm or from the lower back into the leg
These symptoms can indicate nerve compression or disc involvement. Repositioning helps prevent them, but it won't resolve an existing nerve issue. Understanding what to expect from chiropractic adjustments can help you decide whether a clinical evaluation makes sense for your situation.
How should you prioritize ergonomic purchases?
Try free fixes first. Mayo Clinic's ergonomics guidance is direct on this: rearranging and adjusting existing furniture resolves most ergonomic problems before any spending is needed. Only buy equipment when repositioning has genuinely failed.
Purchase priority framework:
- Free: Adjust chair height, monitor position, keyboard angle, and foot placement using what you already own
- Under $50: Footrest, monitor riser, external keyboard and mouse, cable management clips, lumbar cushion
- $50–$300: Adjustable chair with lumbar support, monitor arm, anti-fatigue mat, docking station for laptop users
- $300+: Sit-stand desk, high-adjustability ergonomic chair, external monitor
When evaluating a chair, these are the features that matter:
- Seat height adjustable to your specific leg length (not just "adjustable")
- Lumbar support that moves up and down independently
- Seat depth adjustment (sliding seat pan) or at minimum a seat that fits your thigh length
- Armrests that adjust in height; width adjustment is a bonus
For a sit-stand desk, the must-haves are a height range that covers both your seated and standing elbow heights, a stable surface at full extension, and a programmable controller so you don't skip the standing intervals because adjusting is inconvenient.
Features to avoid: Chairs with fixed lumbar humps at a set height, armrests that only move up and down in large increments, and any desk marketed as "ergonomic" that has no height adjustment at all. The label is not a guarantee of fit.
A spinal wellness plan that combines correct equipment with movement habits and clinical support where needed tends to produce better long-term outcomes than equipment alone.
What small workstation changes actually move the needle for patients?
Small positioning changes often deliver measurable symptom relief faster than most patients expect. The pattern is consistent: someone comes in with neck pain or wrist discomfort that has been building for months, and the first question worth asking is always about their workstation. More often than not, the monitor is too low, the chair is set to the wrong height, or they've been resting their wrists on a hard edge for years without realizing it.
The checklist in this article reflects the same sequence used in clinical ergonomic assessments: chair first, monitor second, keyboard and mouse third, then movement habits. That order matters because each adjustment depends on the one before it. Patients who work through the sequence systematically, rather than jumping to buy a new chair or a standing desk, tend to see faster improvement.
Chiropractic care at Essentialchirocare addresses the structural consequences of poor workstation ergonomics, including cervical and lumbar joint dysfunction, muscle imbalance, and nerve irritation. What it cannot promise is that ergonomic corrections alone will resolve symptoms that have been present for months or years. The checklist is a starting point. When symptoms persist or worsen despite correct positioning, a clinical evaluation is the appropriate next step.
Posture's long-term impact on health is well-documented, and the workstation is where most adults spend the majority of their waking hours. Getting it right is one of the highest-return investments in musculoskeletal health available.
Pain persisting after checklist fixes? Essentialchirocare can help
If you've worked through the checklist and pain or neurologic symptoms are still present after two weeks, a professional evaluation is the right call. Essentialchirocare's clinics across Tampa, Brandon, Sarasota, Lakeland, and Pinellas Park offer chiropractic care that addresses the structural issues workstation fixes can't reach on their own: joint dysfunction, disc irritation, nerve compression, and muscle imbalance that have built up over months of poor positioning.
The clinic's services include chiropractic adjustments, physical rehabilitation, spinal decompression, and manual therapy, with personalized treatment plans built around your specific complaint. Online booking is available, and the team works with most major insurance plans. If your symptoms started after a car accident, the clinic also handles auto and personal injury cases. Book an evaluation at Essentialchirocare and bring your checklist results — knowing exactly which items you answered "No" to gives the clinician a useful starting point.
Sources
These are the primary references behind the checklist guidance:
Recommended